Thursday, July 12, 2012

Crafts, Ideas, and Inspirations

Since I get used to this DIY crafts, I have been addicted to all this DIY stuff. Ideas come and go, but thanks to my Pinterest, its very useful when it comes to keeping all the ideas of crafts. Now I always surf the Youtube to find new ideas on making new DIY. I intend to venture myself into making cute fabric toys later. Soooo Cutee!! But, it needs sewing skills which i never have. Damn..

Fabric flowers are cool too. Very pretty! I gave my friend a baby's headband as a gift for her baby girl. Here's are some of the DIY that i've completed.


Wednesday, July 4, 2012

Preparation for the Wedding

Since i planned to have a simple wedding, I try to keep things simple too! I try to stick to the ultimate principle, the simpler, the better! Another goal is always about minimizing the cost. I don't want to spend too much on unnecessary things, and regret it for being broke later. I am trying to save as much as possible so we will have extra RM$$ to spend during the honeymoon or any emergency cases later. You might never know what will happen in the future.

I have been start planning and try my best to execute the plan since early April. I have prepared my "Action Plan" and start executing the plan accordingly. In any cases like this, Cash has always been the key to execute any plans made. I don't know if people can see what i see, but I think i can save a lot by DIY. From wedding cards, wedding decor, and Door gifts and etc...I can save almost a thousand ringgit. A lot of research really works too! I can get many ideas from the internet. And some of them, u never expect it to be soo simple. Hehehe....

Less than 100 days to go before the actual day, I'm trying my best to prepare whatever is necessary. I know there will be hiccups along the way, but i just need to find a way to solve it. Even though Im dreaming of a simple wedding, but I want it to be memorable for the rest of my life!!!

Tuesday, July 3, 2012

DIY Wedding Invitation Card

Wedding Invitation Card is one of the most essential part of the wedding itself. Some people are willing to spent thousands Ringgit to ensure their wedding card looks nice and of course, expensive! Well, from my point of view, it doesn't necessary have to be very expensive as long as it fulfill its function. But, anyway, that always depend on the couples preferences too.
So, my sister suggested that we should start printing our own wedding invitation card. She's very excited showing me all her design that she could find. She also helps me a lot in completing all the designs and print it out. She's been very co-operative and committed in completing all the cards. I promise to return the favor during her wedding later. Without her, I would have spend few hundreds on cards printing ONLY.
When she showed me the first sample, and we showed it to our parents, they asked us to change some parts of the card. After the amendment, I think the outcome is sooo pretty. It's simple but pretty and all the info is there. So, as long as the message is there, I think it already fulfills it's function. Thank You Sis!! Another DIY for my Wedding and another few hundreds were saved!! Yayyy!!!

I just need to add some rebens and it is good to go!

Thank you Sis!!

Wrist Corsage

Last nite, I completed six of my Wrist corsage. I had soo much fun in doing this. Here's what i have just completed.

My simple DIY wrist corsage


For my flower girls and bridesmaid!

Monday, July 2, 2012

MY DIY Pillow Ring

Last weekend, my DIY project is to make my own Pillow Ring. I wanted to make a simple but sweet pillow ring for my Wedding Ring.  The initial plan is, to use the real small pillow to make the pillow ring. But, when i get to the crafts shop, my head seems to change its plan. I bought 2 different size of heart shaped styrofoam. At that moment, i knew exactly what im gonna do with it.

  • 2 heart shaped styrofoam (Different Sizes)
  • Rebens
  • Scissors and pliers
  • Ring Box
  • Flowers
  • Satin and lots of pearl
  • Glue Gun
These are the basic things you need !!!


Satin! Cream Color is nice!!

Steps in Making DIY Pillow Ring

1st Step: To wrap the styrofoam with the satin.

Use the glue gun to minimize any gather created during the wrapping process.


2nd Step: Cut a piece of felt cloth to cover the back of the styrofoam. This is to hide any unwanted excess satin.
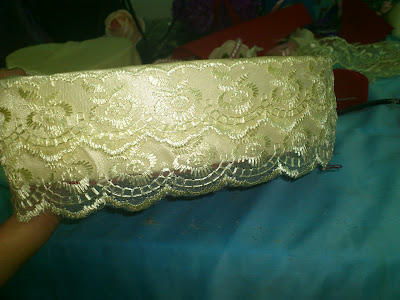
3rd Step: Add the lace around the styrofoam to cover any unwanted ugliness!
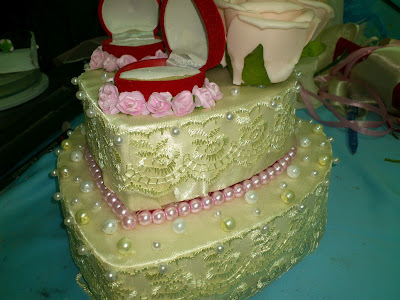
4th Step: This is my favorite step, you get to glue anything on your pillow ring! I begin with my pink roses!
Add all the pearls!


Tadaaa!!! Here's my Pillow Ring!

Since i'm done with with my pillow ring, I can proceed with another DIY project. Yay!!!